
If you’d like to add or remove zip codes from your service area, you can do so easily from the dashboard. We’ll get into exactly how to do that in just a second, but first a couple things about adding and removing zip codes before that.
With those two things out of the way, here is how you can edit your zip codes in our system.
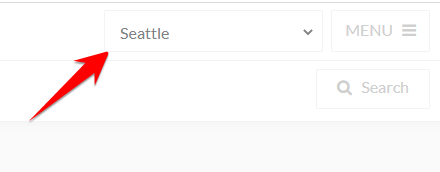
1) If you have multiple markets with Geek, be sure to select the appropriate market from the dropdown at the top of the screen.
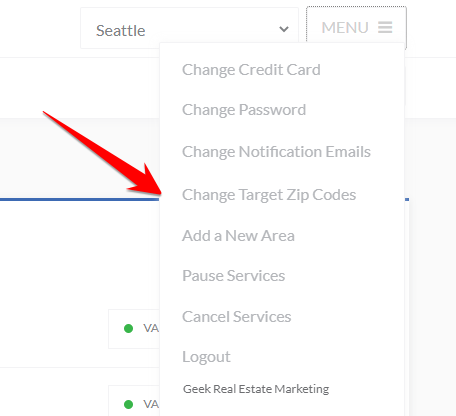
2) Navigate to the “Menu” in the top right corner of the Geek Dashboard and select the “Change target zip codes” option.
3) Select from the drop down whether you’d like to add or remove zip codes, then paste a comma separated list of the zip codes you’d like to remove in the box provided.
If you are unsure which zip codes we have listed for you in the system, click the [+] next to “View current zip codes” to show them.
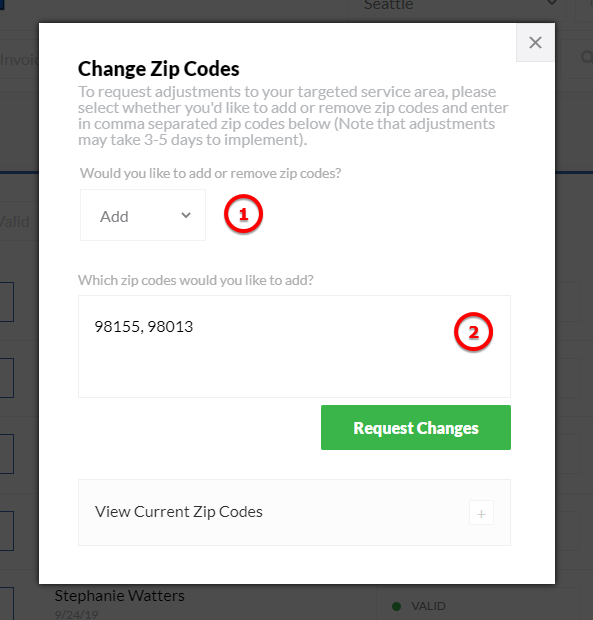
4) Click the “Request change” button, then confirm your changes on the popup that follows. At this point, your requests will get sent to us for review. We should be able to approve them within the next few days after the submission of your request and make the necessary changes. You’ll be notified when the changes have been completed.